Using libraries
1 Introduction
In a previous article (Timers) we developed a class that seems a very reusable. If we want to use such a class in multiple projects, it does not seem wise to copy the class code into each new project.
In this article we will investigate how we can add our STimer class to the eclipse SDK environment so that we can use it from any project.
2 Creating a library
As the Android developer site explains, with eclipse and the ADT plugin, we can create a library project containing our STimer class, and we can create application projects using that library. In this section we set up the library.
2.1 Creating the library project
The first step is creating a project. This is done in the same way as an application project is created.
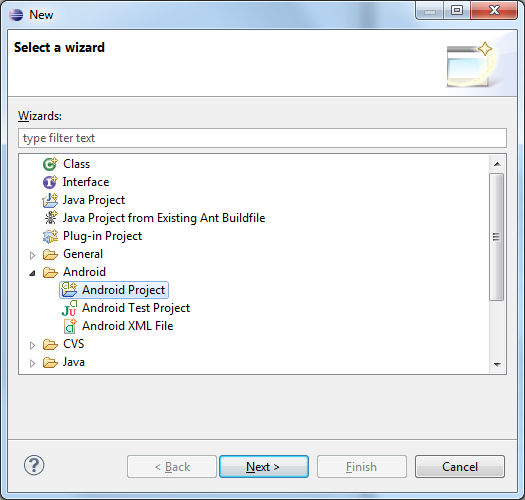
The standard new project dialog is also use for creating a library
Probably the only interesting thing when filling out the project wizard form is unchecking the 'create activity' checkbox.
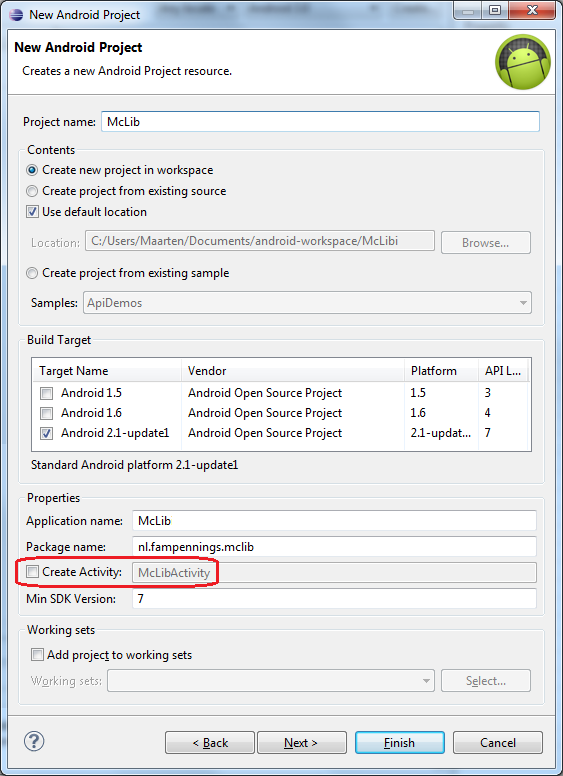
The standard project wizard (do not create an activity)
2.2 Tagging project as library
The crucial step in creating a library comes now. In the eclipse package explorer we have to right click on the newly created McLib library and chose properties. On the left pane select Android. Check 'Is Library' in the Library box.
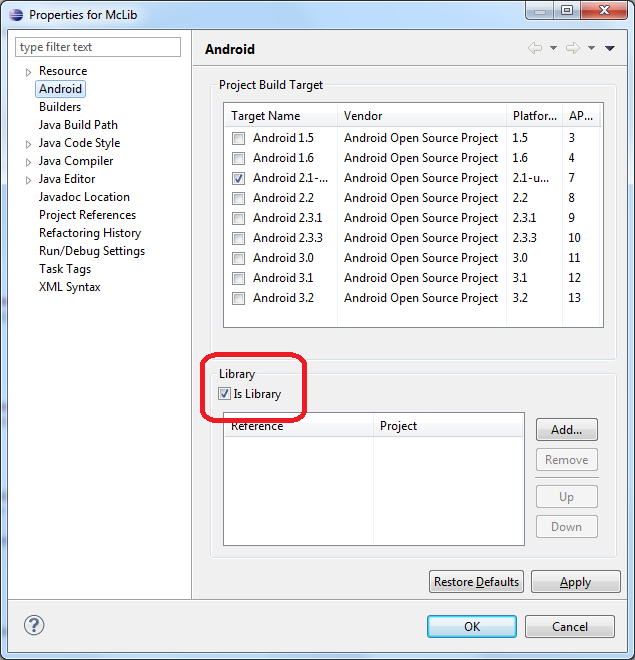
Tagging a project as a library project
2.3 Cleanup
The third step is a bit of cleanup action. First, we open the AndroidManifest.xml file and remove the lines on the application (the red fragment below).
<?xml version="1.0" encoding="utf-8"?>
<manifest xmlns:android="http://schemas.android.com/apk/res/android"
    package="nl.fampennings.mclib"
    android:versionCode="1"
    android:versionName="1.0">

    <uses-sdk android:minSdkVersion="7" />

    <application android:icon="@drawable/icon" android:label="@string/app_name">
    </application>

</manifest>
Now that the reference to the string (app_name) is removed, we can delete all resources. Go to the explorer and delete all files and directories in the res directory. We can not delete the res directory itself; eclipse will complain about that. Press F5 in eclipse to re-sync the project with the file system.
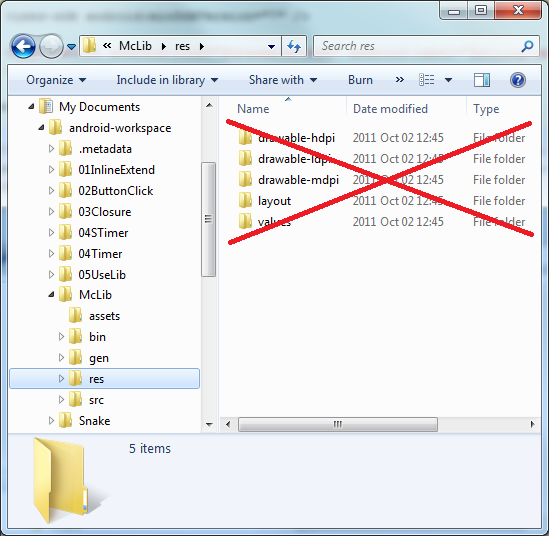
Deleting all resources
2.4 Creating the class file
The fourth step is to create a class file. Right click on McLib/src/nl.fampennings.mclib in the eclipse package explorer, and select new class. Check that the location and package is OK, and fill out the name. Note that the base part of the file name (before the .java) should be equal to the name of the class inside that file (here STimer).
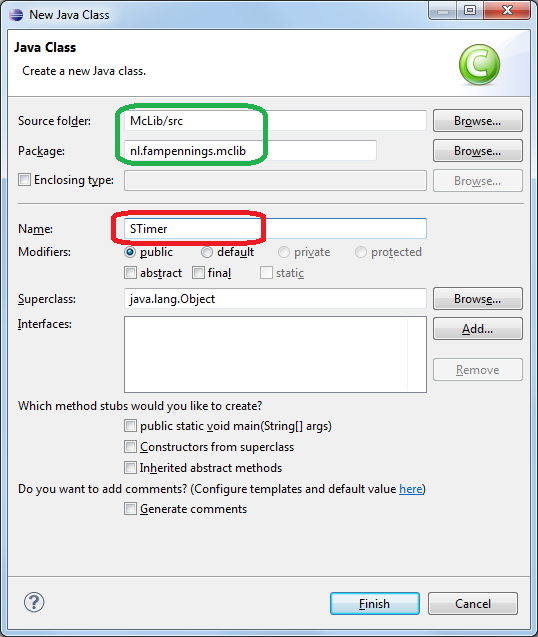
Location and package OK (green) and filling out the class name.
Finally, we add the class code. Note that first line (blue) of the java file refers to our library package name.
package nl.fampennings.mclib;

/**
 * A class that implements a simple timer.
 * The timer does not create a separate thread,
 * so there are no multi-threading issues in your activity.
 * The timer uses an event listener as callback when it expires ("alarm").
 *
 * @author Maarten Pennings 2011 September 26
 *
 */
public class STimer {

    /**
     * The minimal value for the period of a timer (in milliseconds).
     */
    public static final int MinPeriod = 10;

    ...

    /**
     * Returns the current period of the timer.
     *
     * @return the current period of the timer in milliseconds
     */
    public int getPeriod( ) {
        return mPeriod;
    }

    /**
     *  Interface definition for a callback to be invoked when a timer expires ("alarm").
     */
    public interface OnAlarmListener {
        /**
         * Callback that timer 'source' has expired ("alarm").
         * @param source  Timer that expired (when multiple timers use same listener)
         */
        void OnAlarm( STimer source );
    }

    ... lots of stuff omitted ...
}
2.5 Adding Javadoc help texts
Since the class in the library is supposed to be reused, it is good practice to add some help. Comments that start with /** (note the double star) provide a help text for the definition following it. This can be done for the class definition itself (see e.g. STimer), its member variables (see e.g. constant MinPeriod), its member functions (see e.g. method getPeriod), and its inner type definitions (see e.g. interface OnAlarmListener). Note also that the inner definition has a method which has its own help text (see e.g. method OnAlarm). Finally note that these help comments have some reserved words (e.g. @author, @return, @param). See Javadoc for all the details.
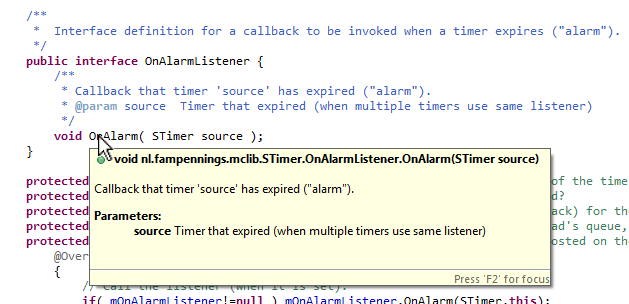
Example of the help pop-up when hoovering over onAlarm.
This concludes creating the library project. We'll now start using it.
3 Using the library
Now we are going to created a project that uses the STimer from the library.
3.1 Creating the project that will use the library
Go through the normal File | New | Other | Android | Android Project and fill out the project wizard as we did for any project.
3.2 Adding the library reference
Once the new project exists, go to the eclipse "package explorer". Right click on the newly created project and chose properties. On the left pane select Android, and add a library reference.
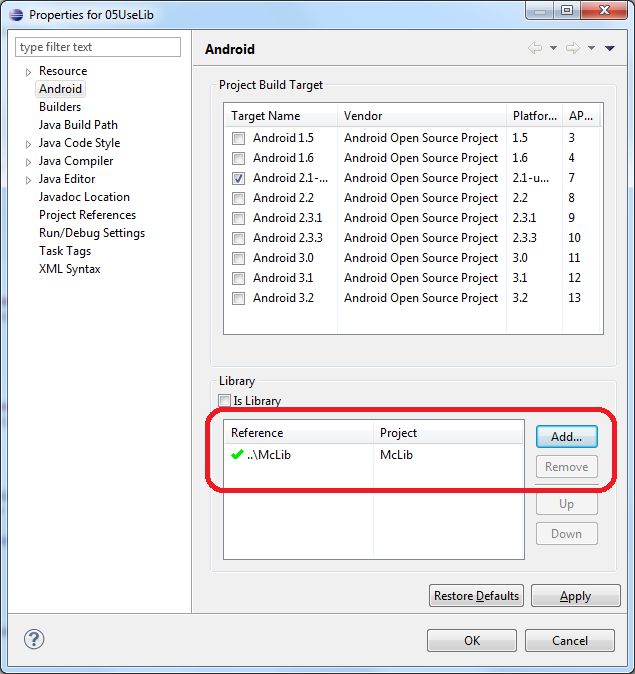
Adding a reference to the library from our project
3.3 Imports
The first time the activity in the new project uses something from the STimer class, the compile will generate an error flag in the left margin.
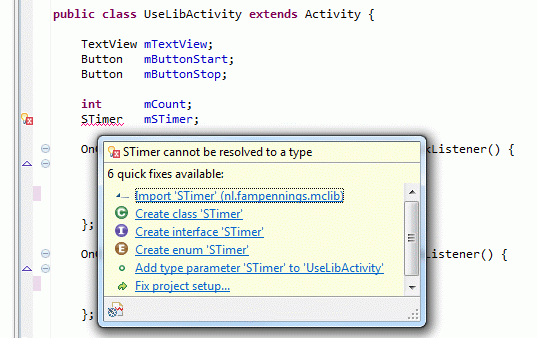
The STimer type is not yet imported
Simply select "Import 'STimer' (nl.fampennings.mclib)". This adds the following line to your code.
import nl.fampennings.mclib.STimer;
4. Version management
It should be noted that if a class is used in multiple projects, care should be taken in version management.
Project AA, using the library version 1 could be released. Project BB, also using the library, could make changes to the library (version 2). If later a bug reports come in for project AA, this should not be tested with version 2 of the library, but rather it should be tested with version 1 for reproducing the bug.
If project AA is released with a bug fix later on, a choice should be made whether project AA is shipped with version 1 or version 2 of the library. Or, if the bug was actually in the library, and a version 3 is developed, one should wonder whether a new release of project BB is also needed...

